
This post has been a long time coming. I just knew it was going to be massive, so I kept putting it off. Oops.
Just a warning, this post is extremely picture heavy.
When Tyler and I started dating, he showed me his massive book collection (lots of graphic novels, mostly), and mentioned how much he would love to have built in book cases big enough to hold them all one day.
Then we got married and bought a house. And he said again, how much he'd love to have built in book cases in our house.
So naturally the house we bought had no such thing.
So I decided my first major home improvement project would be to give my new husband the built in bookcases he's always wanted. I googled this until my google resources ran dry. I probably read the same 5-6 tutorials 20 times in the hopes of gleaning just another tidbit of information on how to go about this. Eventually I decided prepping and researching was only going to get so far, and I had to just roll up my sleeves and start working.
I measured the wall in the room we'd dubbed as Tyler's Library. We went to good ole' Walmart after 4 of these after I figured out how many would fit on the wall (3, the 4th one got used for scrap parts). I'm sure you've seen them. You've probably owned one at some point.

Unfortunately our Walmart only had 1. So we decided to order some of the ones we'd seen online that are actually a few dollars more, but appear to have better reviews overall and are a different brand (Orion). But they sent us 4 Mainstays instead. So we sent them back and ordered again.
And got the Mainstays again.
Extraordinarily irritating.
We had to work it out with Walmart on the price difference (and they fought us on it too! Not for long, but still...), but we decided to keep the Mainstays for the sake of our sanity.
I commenced to roll up my sleeves.
We'd just finished painting this room the color of Tyler's choice, Parliament Green (it's an HGTV Sherwin Williams color). I just knew the wall of white bookcases would pop against this color fabulously. It's a very bold choice, but I'm actually considering painting our front door this color too. It's a beautiful teal color. I do love me some teal.


The baseboard on the wall had to come off. I planned on putting it along the front of the bookcases to help with the built in look. I don't have one of those baseboard removal tools, so I just used a flathead screwdriver and a hammer. It worked just fine with minimal casualties. =)
 |
| Be sure to score the edge with a razor first! This was a newly painted room, so I didn't want to chip that paint job! |

I put that off to the side and we started putting together the bookcases.
 |
| BTW!!! I've put together my fair share of these, and it wasn't until I was doing this with Tyler that he thought about using painters tape to hold the backing in place while we nailed it on. Sheer genius, I tell you! I can't believe I never thought of it. |

It looks like it was a fast job, but this part actually took 2 days. o_o;
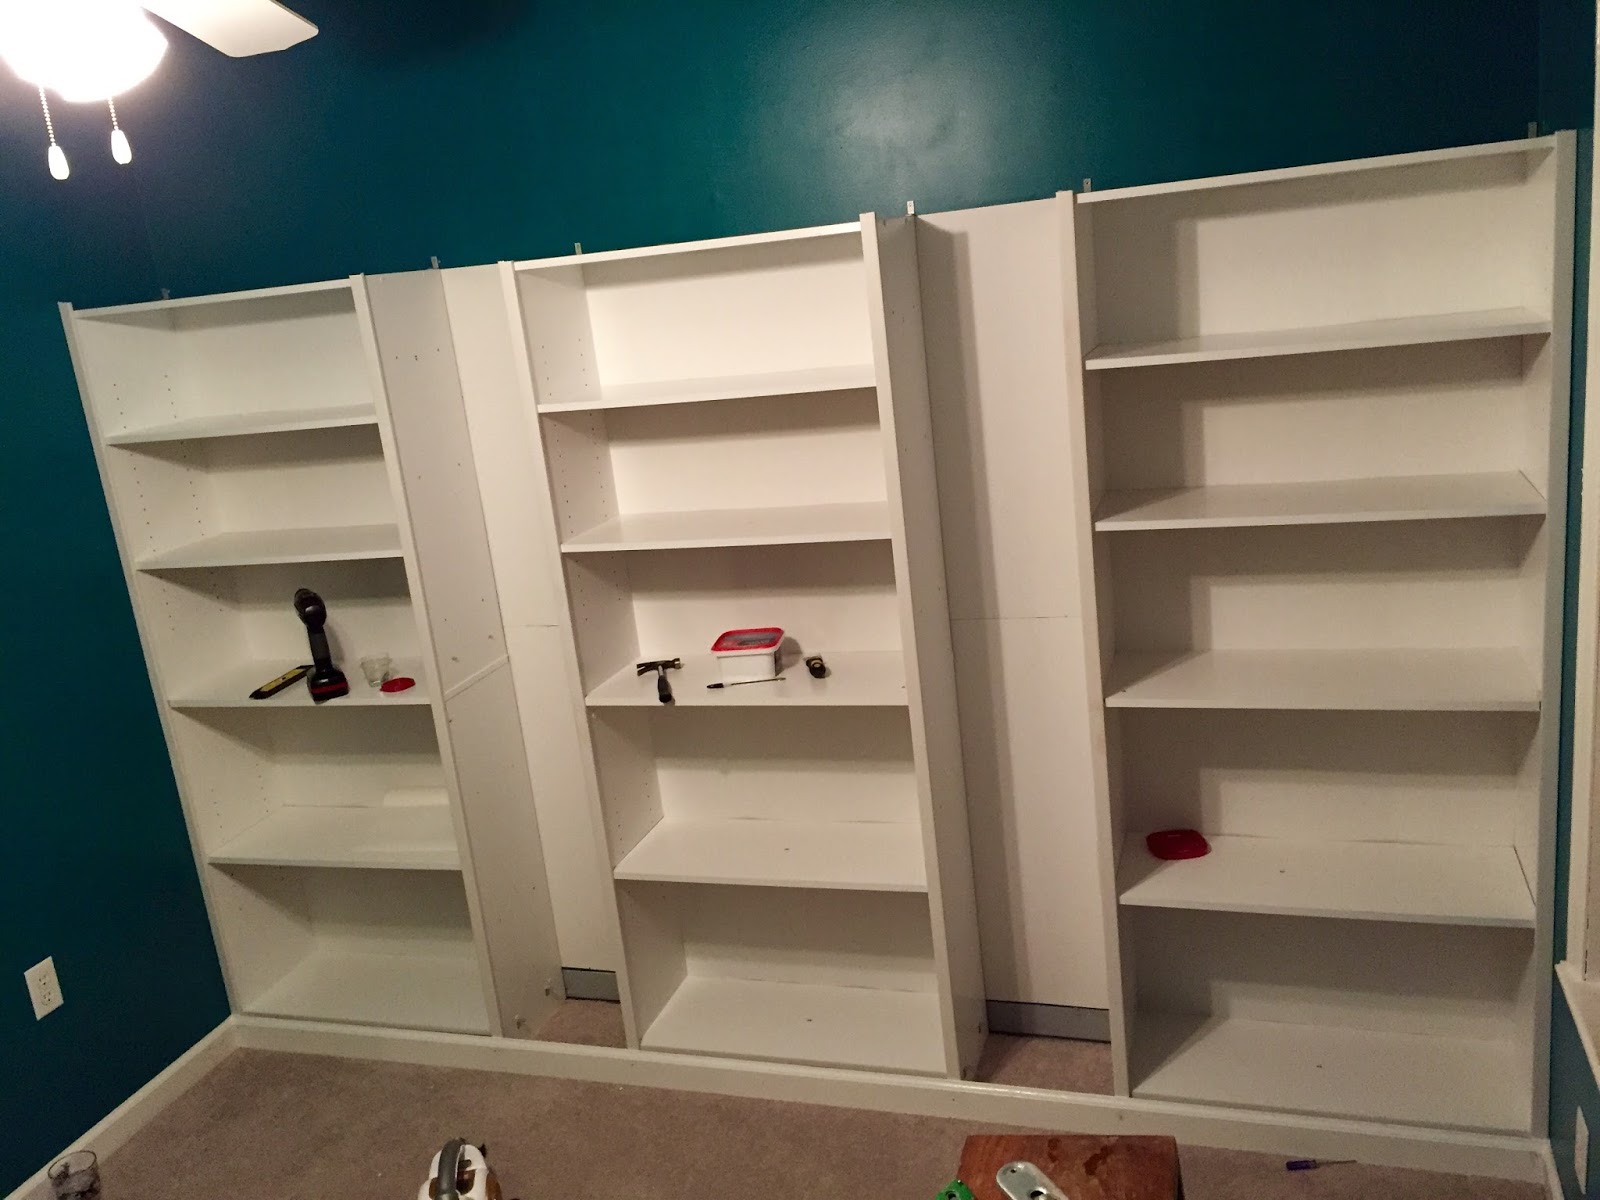
Once all 3 were built, it was time to take out the fourth book case. I used the paperboard backing in that one to cover the teal walls in between the 3 main sections. This way, Tyler would have 2 skinny sections between the 3 larger ones. The actual boards an shelves were measured and cut down to fit as the shelves for those smaller sections, thanks to my father-in-law's table saw.
I did have an outlet to work around with the backing. I just measured and cut out around it and put the outlet plate back on over the paperboard.


Tadaa!!!

We pushed the bookcases as flush to the back and the side as possible, and I anchored them with little L Brackets (not the "anchors" that come with the bookcases. Those are silly). We don't have kids to climb on these so I figured these small ones would work just fine.
 |
| Just pretend that crack isn't there... Shhhhh... |
 |
| Funky is right.. |
But it all worked out in the end..

Here's a side by side while this was in progress. The right side has the molding and the left doesn't yet. Pretty big difference between the two, eh?

The molding wasn't sitting flush since the middle shelf actually jutted out a couple millimeters. You can see where we shaved it back so that the molding would fit.


I used more of that molding along the edge of the bottom shelves to give the baseboard something to be against. Otherwise there would've been a gap. Gaps are no good. Here's what No Good Gaps look like.

If I had thought this out, I would've put the little molding pieces on before putting the baseboard back. But I didn't. So I didn't. My mistake is your gain. Put the molding on first.
This was my solution to the bottom shelves for the small sections:

More L Brackets!! This part took a lot of measuring, because I wanted to make sure they were mostly level with the larger sections, and hid the bottom edge of the paperboard.
It turned out pretty well.

All those gaps got filled with a DIYer's best friend: Caulk.
Let's have a little Before & After action, shall we?
Before...
 And After!! |
 |
Caulk fixes a multitude of DIY sins.
We got some crown molding for the top, which turned out to be much more difficult to put up than I'd foreseen. I imagine it would've gone a lot smoother with a brad nailer, but that's not in my toolbox yet.
Once that was in place. Nail holes were puttied, seams were caulked, and all the front molding got a coat of paint!

I'm not confident where this photo falls in that timeline of events, but it's in there somewhere.
Tyler's rearranged them several times now. They hold most of his books (we have a few freestanding bookcases on the other walls, they're full too!), all of mine, our board games, a lot of his video games, and his other collections, like his MLP plushes, and Pokemon figures from his childhood. He loves having everything on display like this, and the Library gets a lot of positive attention whenever we have people over.

After having lived with them for a while now, I'm considering replacing them with real wood built-ins. The laminate shelves would be fine for most people, since most people aren't loading them down with seriously heavy books like my husband does! Some of the shelves are reinforced with shelf brackets to keep them from bowing under the weight.
I also caulked all the corners and edges, and while the shelves were empty, it looked fantastic, but the movement caused by the bowing shelves makes the caulk crack and look not so great. It's not noticeable when the books are there, but it does bother me that all that work was for nothing.
Redoing these probably won't happen for a while, seeing as how these are a recent addition by home improvement standards. They're working fine for now. And if their appearance starts bothering me or if the shelves ever start getting a serious curve, I'll look into ripping these out and replacing them with stronger, real wood built-ins.
But I brought the idea up to him, and he said he fully supports it whenever I want to redo them. =P
No comments:
Post a Comment
I read and cherish every comment. I'd love to hear from you! =)