
Just for old time's sake, here's where we left off..

Definitely an improvement on where it started. But I've done a lot of work in here over the past couple of months!

I do have some in-progress photos (the ones I remembered to get, anyway...).
I got some lumber, a 1x10 board (I think I got aspen.. not sure), cut in half so I had 2 pieces (for the shelves), some plywood cut down so that it was the same size as the top of the base cabinet, and a piece of 1x2 that I attached to the front of the plywood to make it look more substantial countertop instead of only 1/2 thick.

The smaller pieces of plywood were glued to the bottom of the big piece so it was raised up a little more to clear the drawer.

And the 1x2 was glued to the front in the same way. I let those dry overnight and I put some wood filler in the crack between the 1x2 and the plywood so it was a smooth transition.
I do use wood conditioner before any staining. Mostly just because my dad told me that I should. And ya know, dad's are always right about that stuff.
And I've never had a blotchy stain with it, so I guess I'll keep on with that.
 |
| Our poor garage floor... |

And after 3 coats. The different types of wood took the Polyshades very differently. But thankfully it all evened out by the time I got to round 3.

As a side note, I don't recommend Polyshades for something like this. It was a little too runny, and the edges of the shelves dripped and look... kinda funky.


I put the worse sides on the wall, believe it or not.
It's not a huge deal, but eventually if I ever run out of stuff to work on in this house (so never, probably), I may sand them down and stain/poly them properly. The color is redder than I'd really wanted, but whatever. It's still very pretty. I used the color Antique Walnut.
I was going to use some chunky wooden shelf brackets, but when it came down to $7 vs $2 each... well, I decided the white metal brackets were kinda cute!
The molding on the cabinets really makes the room, I think. The cabinets themselves were a major improvement to the single cabinet that was there (if not an upgrade, they're still particle board and laminate, but at least the face frames and the doors are wood). But I looove the way cabinets look with crown molding and some extra details. I put lattice molding on the sides so that I had something to attach the crown molding to, and made it look more like a custom cabinet instead of a prefab. The bottom is just some skinny molding, and I put some even skinnier molding on the sides between the door and wall to hide the cracks. The cabinets didn't get quite flush with the wall. I'm not exactly an experienced carpenter that can scribe cabinets, so covering it with molding was my best option. I like the result, anyway. Everything got held in place with tape, caulked and painted (after like.. a month. I got distracted, ok?!)


Phew!!
Now, lets talk about the light. It was a dome. Not bad or anything, but it definitely lacked character. Just a basic, builder grade light. Probably as old as the house.
I found a photo of the old light! This was in the group of photos the inspector took of the house when we were buying the house.

Like I said, nothing special, but I've seen worse.
We have a bargain store in our town that Tyler and I love to browse in every now and then. The longer stuff sits on the shelf, the higher the percentage off the listed price. If it sits long enough, you can get stuff for next to nothing. Their products can be used, or seconds from retail stores that are just trying to get rid of extra stock, and you never know what you'll find there. They carry a little bit of everything, except food. Tyler even got a fantastic deal on a new Tommy Hilfiger leather jacket there once. I was actually pretty jealous that they only had a men's version.. *grumble*
Anyway! Back on track. I fell in love with the schoolhouse light on Pinterest. They're gorgeous and come in so many shapes!
Here are a couple of examples I ran across on Pinterest, with links back to the sources, of course:

Source: House185

Source: The Inspired Room
I loved the antique vibe, and that the bulb is actually covered. I don't really like seeing the bulb itself. And I love milk glass, so there's that.

This store had about 4 for $15 each. The only problem was, they were polished nickel, and I'm wanting all our fixtures and hardware to be bronze. Not a big deal, I can spray paint them, but I was wanting 3 of them (1 for the laundry room, 2 for the hallway/foyer). I don't mind buying stuff with the intention to spray paint it (in fact, I look for stuff that I can alter to suit my needs), but spending $15 each on something like that kind of set my teeth on edge. So I decided to wait, and if it was meant to be, they'd be there when they went down a little more. Their light fixtures tend to stick around a while. Not their most popular section. I could handle spray painting $10.
I went back during my lunch the other day, and there they were, $10 each. Wahoo!!! I swiped those up and tried not to drop them while I did a happy dance in the parking lot.

I got them spray painted today and put up the one in the laundry room. I need to get some light bulbs for the hallway before I can put up the other two.

Squee!!!! This was my first light fixture swap out too! I'm so proud of myself. And it wasn't hard at all, just fiddly. I'm not going to give a how to on that. But there's plenty of how-to's on the webs, and some of them are written by.. ya know, people who do electrical things for a living.
Just make sure you turn off the circuit breaker to the room before you start working. Voltage and people don't really mix. Don't electrocute yourself, 'kay?
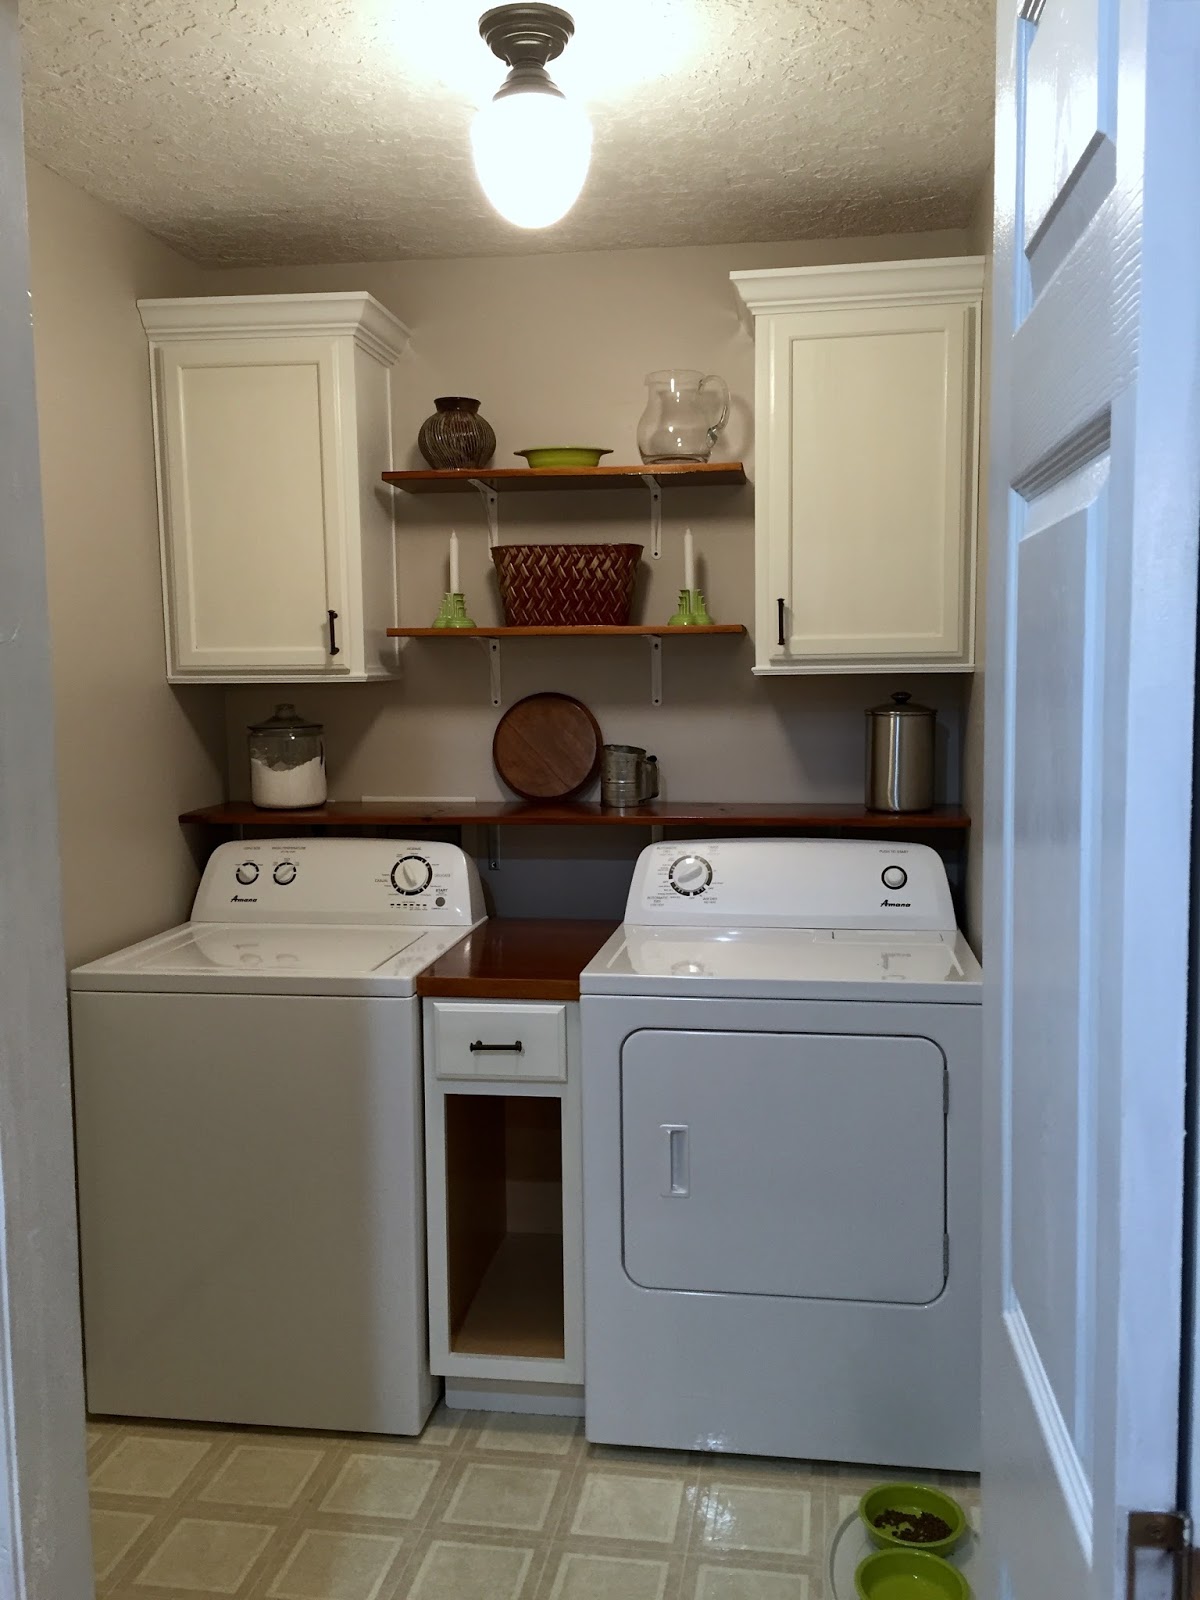
All I have left to do in this room is crown molding (which I have to do in most of the house anyway), and door trim, the floor, and making a slide out box for the big door of the base cabinet. It's going to be one of our recycling areas.
Almost done!!
Here's a final after shot again, so you don't have to scroll all the way back up.
Just wonderful progress ! So proud of you.
ReplyDelete